07 September 2010

Fruit of the Day: Crab Apples

If you've been following the saga at Ultra Fine Flair, you knew this was coming.

A crab apple, not to be confused with a non-crab apple apple, can't make up its mind. Most days, it's a useless fruit that falls into someone's lawn in Southwestern Ontario or the Northeastern United States, and, much to the chagrin of Bills-loving homeowners, rots. Occasionally (and unfortunately, much more rarely), it's a fruit that smells mouth-wateringly sweet, tastes mouth-puckeringly tart, and produces an abundance of juice that can be coaxed, through various stages involving de-stemming, boiling, sugaring, and filtering through cheesecloth, into an electric red and very tasty jelly.

Despite their proliferation in backyards this time of year, crab apples are apparently hard to come by. We visited farms, farm stands, and farmers' markets. I think that was our biggest mistake, actually, because nobody grows these trees on purpose. We'd have been better off visiting area yard sales and surreptitiously gathering the fallen fruit (possibly while simultaneously haggling over the price of a toaster). We finally found some, and negotiated a price of $25/bushel.

Note: A bushel is more than you'll ever need. Even my Special Ladies could only use half. It broke my heart a little to see the rest of that fruit rotting, but we do have enough crab apple jelly for the duration.

In the interest of research, I grabbed a few to photograph and taste. We even took some to the beach!
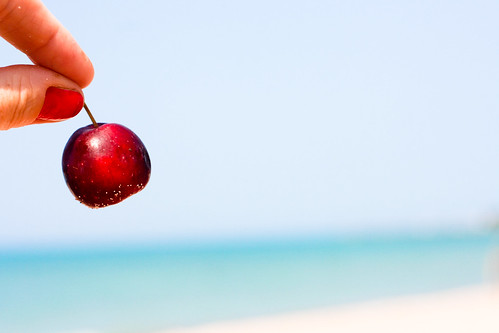
We both sampled a crab apple. This particular variety smells sweet and tastes tart, although not inedibly so. They're not the most efficient snack, though, unless you have a very small mouth.

Ken opted to eat a plum instead. It was very pretty inside.

A local seagull, however, was not so discriminating. After I chucked an excess crab apple onto the sand beside me, he nabbed it and ran off. À chacun son goût.

UFF Fruit Rating:

11 June 2010

Saucy Pizza

Sounds a little bit naughty, doesn't it?

I like my pizza with a thin, crispy crust. Fresh mozzarella, if it's available, is delish. Big basil leaves, yes please, and pass the oregano and red pepper flakes. And, for as long as I can remember, I've ordered pizza with extra sauce. I love me some good saucy pizza. Unfortunately, my passion for plentiful stewed tomatoes isn't shared by my Argentine counterparts, who seem to prefer pizza that's bready and cheesy, but not so much saucy. There is sauce, to be sure, but during the pizza-making process it gets all mixed in with the cheese, and in the process, kind of lost.

All of this isn't to say that I'll turn down any pizza. From the place next to where I worked in California with the deep-fried crusts (yes, that is as good as it sounds), to a giant $2 NYC slice, to an Argentina-style pie, offer me pizza, and I'm in. But I also like a project, and it's been forever since I've made pizza at home, so that's just what I did.

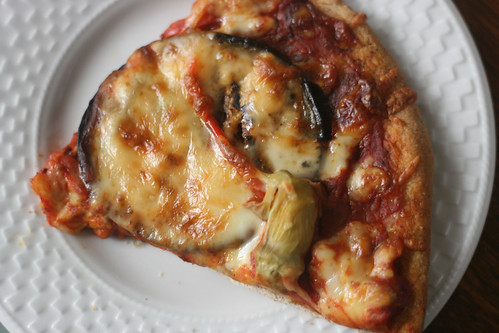
Full disclosure: I cheated a bit. The crust is from scratch, and couldn't be easier. The sauce, however, was from a can. It was a little too sweet, and next time I'm totally going all the way and making my own. But importantly, there was loads of it, probably enough for two pizzas, but all piled onto a single pie. Yum.

Pizza Crust: Really Simple Pizza Dough from Smitten Kitchen (I used half whole-wheat flour)

We topped half with bondiola, and the other half with eggplant, red peppers and artichoke hearts, because while Ken loves him some pork, I'm still trying to keep a couple of functional arteries.

03 June 2010

Make This Salad

Salad schmalad, right?

Well, yes, but I'm living in the land of huge, artery-clogging steaks and doughy, cheesy pizzas and empanadas. And down here it's almost winter, which means we're swimming in root vegetables, and oh dear lord help me if I read one more Northern-Hemisphere blog about strawberries.

You'll freeze some for me, won't you?

Let's be clear: When you order salad at a parrilla (Argentine grill), the default is ensalada mixta, which involves a few sad-looking torn-up bits of lettuce, hunks of mealy tomatoes, and heaps of raw white onions. But you order it anyway, because it makes you feel just a little less guilty about the unnecessarily large yet oh-so-delicious slab of meat you're about to consume.

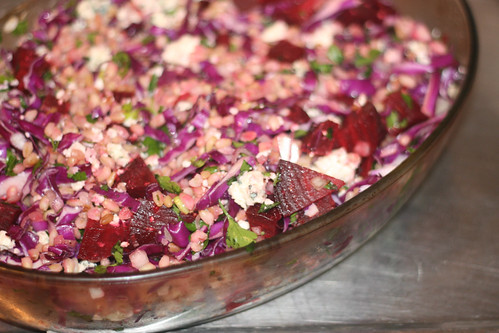
Anyway, in my remaining two months in Argentina, I'm trying to not eat meat at every meal, and also to not contract scurvy. Here in Buenos Aires we prove daily that necessity is the mother of invention. My British friend Sarah discovered the SAP (Second Audio Program) button on her TV when she was trying to figure out how to watch "The Simpsons" in English. And I "created" this salad when I couldn't find many of the ingredients in the original recipe. This version is delicious, and the cabbage will help keep up the ol' vitamin C levels.

Farro, Cabbage, and Roasted Beet Salad
adapted from Epicurious.com

3 large beets, tops trimmed to 1"
1 c semi-pearled farro or wheat berries (note: in Spanish, this is called trigo candeal pelado - at least that's what I used and it's very tasty)
2 T extra-virgin olive oil, plus more for roasting the beets
2 T red wine vinegar
1 garlic clove, minced
1/4 large head of red cabbage, stemmed and chopped
1/2 c finely chopped onion
1/3 c chopped fresh Italian parsley
1 c crumbled blue cheese (about 4 oz/100 g)

Preheat oven to 350°F. Arrange beets in single layer in 8 x 8 x 2-inch baking dish. Drizzle with olive oil. Roast until beets are tender, about an hour. Cool. Trim beets; peel.

Cook farro in large saucepan of boiling salted water until tender, stirring occasionally, about 20 minutes. Note: Your grain's cooking time may vary. Mine took longer, over half an hour. Drain. Transfer to large bowl. Stir 2 tablespoons olive oil, 1 tablespoon vinegar, and garlic into hot farro. Cool to room temperature.

Cut each beet into bite-sized cubes. Add beets, cabbage, onion, and parsley to farro; toss to incorporate evenly. Add blue cheese. Season to taste. Note: The farro (or whatever it was I used) seemed to absorb a lot of salt from the cooking water, so I only added a few twists of freshly-ground pepper at the end, and it was perfect.

I suspect this salad is infinitely malleable. I already want to add a can of chickpeas (rinsed), and some toasted chopped walnuts. The beets could easily be swapped for diced tomatoes, in which case I might also use basil instead of parsley. Yum.

30 May 2010

Yoav's Breakfast Chili

This is Yoav and Denise.

This picture was taken on Christmas, 2008, because even though I just visited them in Toronto I didn't take one picture of them together. Shame on me. I did, however, have a great time hanging out in their backyard, eating pizza and enjoying the many, many hours of daylight that Ontario has to offer this time of year. And I found out that in October they're going to be parents to one of the luckiest babies ever. I can't wait to meet him/her (updated! hooray!).

I also got to try their new breakfast creation, which involved Yoav's homemade chili served up with eggs and avocado. It was delicious, and I was inspired to recreate it when I got back to Buenos Aires last week.

It is so tasty. Please do try this at home.

I used the Beef and Dark Beer Chili recipe from Epicurious.com, which I chose because I like cooking with beer. The flavour wasn't quite intense enough, but I think that's probably because Argentines are not generally counted among those who like it hot, and it's hard to find a good strong chili powder here. But still. Eggs & chili. Did I mention that's going to be one lucky kid?

19 April 2010

Brown Butter

Did you know about brown butter? Did you know that if you just take a knob of butter and cook it in a small saucepan over medium heat, it will sizzle and then bubble and froth and then settle down and start to smell nutty and delicious? Did you know that if you then pour that brown butter into a bowl and let it cool for a while, it tastes like a deep, spicy caramel, and can be mixed with a bit of powdered sugar and milk to make the most delicious frosting?

And if you knew, why didn't you tell me?

Part of my Friday afternoon surfing for food porn involved browsing Martha Stewart's cupcakes. After I wiped the drool off my keyboard, made a small batch of Mrs. Kostrya's Spice Cupcakes to take to a dinner party. Then on Saturday I baked a whole batch of Strawberry Cupcakes for a baby shower.

The spice cupcakes were tasty and gingerbready, and I will make them again, maybe with even more spices. Chopped up candied ginger would also be a delicious addition. The strawberry cupcakes weren't quite as strawberryish as I'd like, and I'll wait to make them again until strawberries are in season and are bursting with strawberry flavour, and even then I'll probably add half a cup or so of strawberry purée to the batter. But I won't change a thing about either frosting, both of which were made with varying quantities of brown butter, confectioners' sugar, and milk, more or less following this recipe, just adding more confectioners' sugar and less milk to make a fluffier frosting (vs. a glaze).

Brown butter. Who knew?

02 April 2010

¡Felices Pascuas!

Can you believe we've lived in Buenos Aires for the better part of the past year? ME NEITHER. All of a sudden there are Easter goodies for sale everywhere and I everyone is going on holidays for Semana Santa and it's just like when we arrived last year at this time.

The other day someone asked me what I miss, and one of the things I miss A LOT is my well-stocked kitchen. Guys, I had not one but TWO Kitchen-Aid stand mixers. Here, every apartment we've lived in (and there have been 4 since January) has its own set of kitchen implements, and when we had a brunch party last weekend, I had to borrow dishes and pans and even a whisk. Right now I am not even in possession of a cutting board. It is a sad state of affairs.

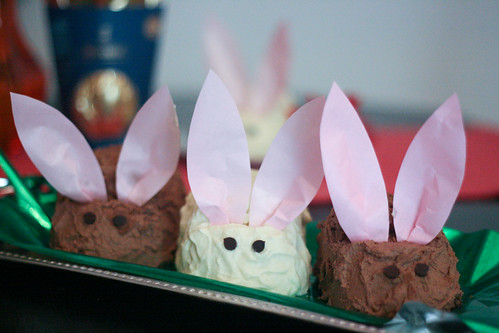
And so, on Saturday I'll be on the lookout for a round cake pan, because it's been 3 years since I've made a bunny cake, and that is far too long.

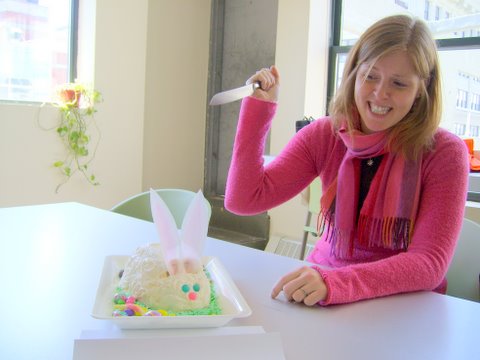
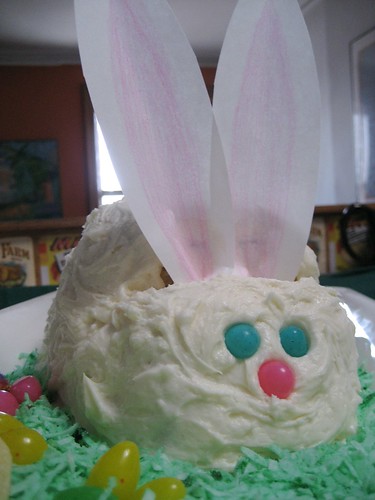
Bunny CakeThis picture is from 2007. My hair is much longer now.

In case you want to make your very own bunny cake, and may I suggest that you do, here are the instructions I carefully crafted back in 2007.

You need:

• A yummy cake recipe (or a cake mix, no judgments!) - I've made many a successful bunny cake with Epicurious' White Chocolate Layer Cake (omitting the apricot filling) but pick something that's easy for you. Carrot cake makes a sweet brown bunny.
• A round cake pan. You only need one round layer to make the cake, so you can either make two bunnies, or use the rest for cupcakes.
• Frosting (I'm going to recommend homemade for this, but only because I don't know of a store-bought one that isn't sickly sweet - funny that I used to be able to eat that stuff right from the cannister!).
• Coconut (fresh coconut is delish but sweetened shredded coconut in a bag works just as well).
• Green food colouring.
• White paper (regular copier paper is fine) and the pink colouring implement of your choice (a crayon, pencil crayon, highlighter, whatever).
• Jelly beans (for your bunny's eyes and nose, as well as to make a flowery meadow for your bunny).

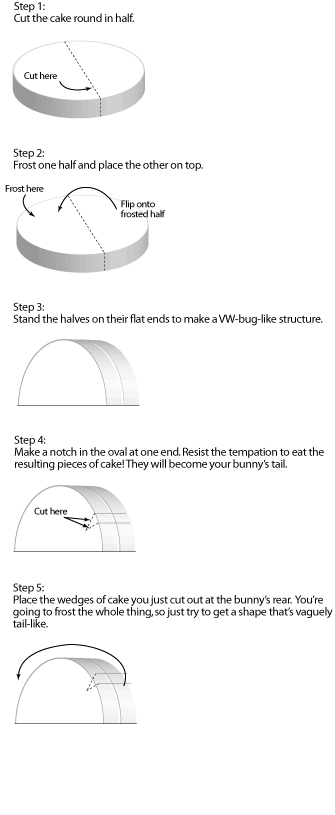
After you've baked your cake, follow these simple instructions to assemble the bunny.

Assembly:

bunnycake
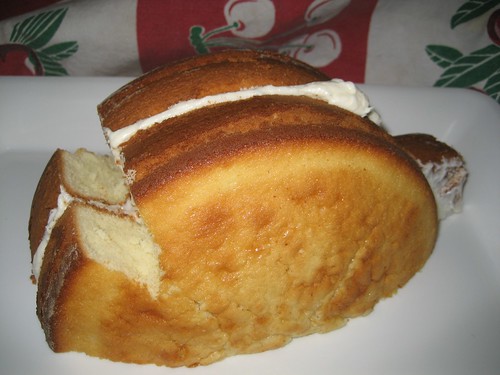
You should have something that looks like this:

Bunny In Progress

Decoration:

• Frost your bunny completely. The tail can get tricky; my best advice is to be generous with your frosting, and don't be afraid to sculpt the tail a little.

• Dye the coconut to make grass: Put some coconut and a few drops of green food colouring in a ziploc bag and squish it all around. If you love coconut, keep some white to sprinkle on the bunny. Spread the green coconut around the bunny so that he's resting in a lovely meadow.

• As you may already have deduced, the bunny's ears will be made of paper. I like to make them after I see my bunny so that they're proportional to his stature - chubbier bunny, chubbier ears. (Hehe, I said "chubby.") Cut your bunny's ears out of the white paper, and add a pretty pink hue to the insides. Tuck the ears behind the bunny's head (where you made the notch out of the cake back in Assembly Step 4).

• Give your bunny jelly bean eyes and a nose.

Voilà! Your bunny is ready to be the centrepiece at your Easter table. Not to mention dessert.

Bunny Cake Portrait